Why Crow Pose Feels Impossible (and What Actually Matters)
Most people assume crow pose demands iron wrists and superhuman arm strength. In practice, the primary obstacles are weight distribution, fear of falling, and a misunderstanding of where the balance point actually lives. Studies in biomechanics journals have shown that shifting weight forward by just a few centimetres can reduce the perceived load on the hands by as much as 30%. (This information is not medical advice; always consult a healthcare provider before beginning any new exercise routine.)
Many beginners make the same errors over and over. Recognizing these early can save months of frustration.
| Common Mistake | Why It Happens | Fix |
|---|---|---|
| Wrist pain within seconds | Too much weight dumped straight into the heels of the hands; insufficient finger engagement. | Spread fingers wide like starfish. Press firmly through all ten fingertips and the pads at the base of the fingers. The palm centre should feel light. |
| Knees slide down the arms | Hips are too low or the core isn’t pulling the knees in toward the midline. | Lift hips higher than you think. Squeeze inner thighs against outer arms and draw the navel to spine. |
| Terror of tipping forward | Gaze is fixed on the hands or floor directly below, which sends the brain a threat signal. | Look forward past your fingertips. A soft focus about 30–40 cm ahead helps the brain register the position as safe. |
| Feet never leave the mat | Insufficient forward shift; weight remains on the toes. | Rock gently back and forth a few times. Notice when the toes start to glide. That’s the tilt point you need to hold. |
The single biggest variable is forward lean. Without it, crow pose stays a wish. The steps below are designed to build that lean slowly, without panic.
Step 1: Build a Wrist-Safe Foundation
Before you even think of lifting your feet, you need hands that can trust the floor. Wrist mobility varies dramatically. If you spend hours typing and rarely load your hands, the tissues can be stiff and reactive. So first, spend 2–3 minutes each practice day doing gentle wrist circles and cat-cow variations on all fours.
When you come to the mat for the pose, plant your hands shoulder-width apart. Spread your fingers as if you’re trying to cover a dinner plate. The middle finger should point forward, not turned out. This positions your wrist creases parallel to the front edge of the mat and aligns the forearm bones in a way that reduces compression.
Many teachers cue “grip the floor.” Think of it differently: push the floor away. Actively pressing down through the knuckles and fingertips creates a small dome in the palm. This wrist activation shifts force into the hand muscles rather than concentrating it in the joint. If you experience sharp pangs in the wrist joint itself, stop immediately and back off to a supported variation like placing a folded blanket under the heels of the hands — the added height changes the angle and often eliminates pain for stiff wrists.
Gaze is part of the foundation. Set your eyes on a spot roughly 30 cm forward of your fingertips. Hold that gaze throughout. Looking back at your feet or down between your hands makes the forward tilt feel more treacherous than it actually is.
Step 2: Engage Your Core Like a Zipped-Up Jacket
Core engagement in crow pose has almost nothing to do with six-pack ab exercises. It’s about creating a compact, rigid unit from knees to shoulders. Imagine you’re pulling the two sides of a tight jacket together, zipping it from your pubic bone all the way to your sternum. That narrowing, drawing-in action locks the torso so the arms don’t have to hold a wobbly load.
Without this, even a perfect forward shift ends in collapse.
Step 3: The Forward Shift (Without Face-Planting)
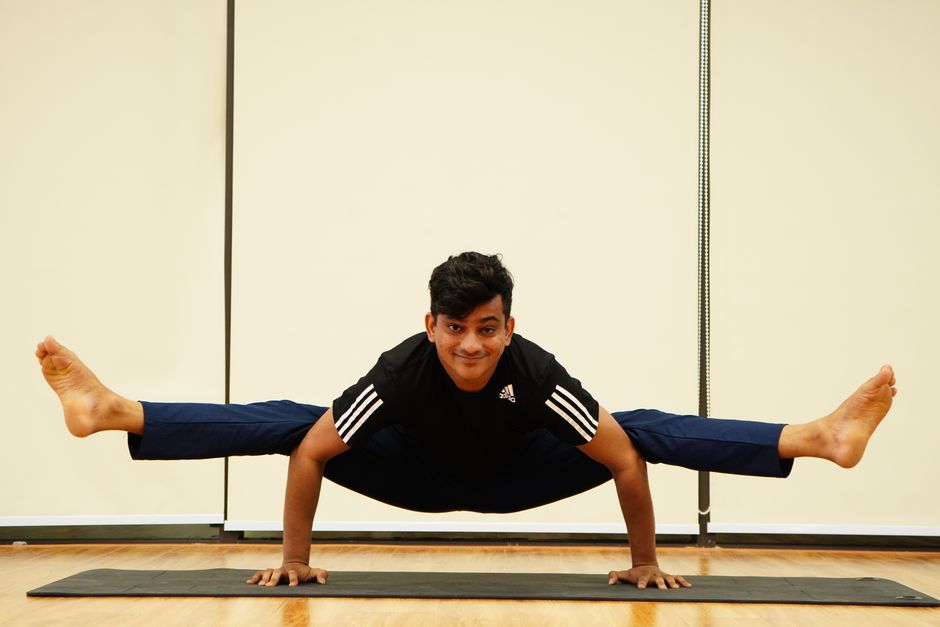
This step is where most people bail. They hover for a second and yank back the moment gravity nudges them forward. The trick is to learn what a controlled forward lean actually feels like — and to accept that the body’s initial “oh no” signal is not a reliable indicator of danger.
What if I feel like I’m going to fall on my face?
Place a cushion or a folded yoga blanket in front of you. Knowing the barrier exists removes a layer of fear. Then, from your squat position with knees resting on the backs of your upper arms, press into the hands and shift your shoulders past your wrists. Keep your elbows bent at roughly 90 degrees — like a shelf. The moment your weight drifts forward enough, your toes will skim the mat. That is the exact point where lift happens. If you fall, you’ll tip gently onto the cushion, not crash.
How do I control the tilt without tensing my neck?
Relax your jaw. Breathe through your nose with a soft, steady rhythm. Many students hold their breath, which spikes tension and makes the head drop, pulling the spine out of alignment. Think of your head as the counterweight: keep it neutral and let your gaze stay forward. If you tuck your chin to your chest, the whole system dumps forward. If you lift your chin too high, you’ll rock back. A neutral head, combined with the forward spot fixation from Step 1, naturally governs the tilt.
How long should I hold the lean before lifting?
Spend several sessions just rocking. Shift forward until toes go light, hold for one breath, rock back. Do this 6–8 times. Gradually increase the hold to two breaths, then three. Lifting one foot comes later. There is no standard timeline. Some people find stability after two weeks of daily practice; others need months. The body dictates, not the calendar.
Step 4: Lift Off — From Tiptoes to Flight
Once you can reliably reach the tipping point and hold it for three breaths without panicking, you’re ready to lift. Approach it progressively:
- One foot at a time. With knees firmly locked onto the backs of the arms, shift forward until one foot peels away from the mat. Keep the other toe lightly touching. Hold for a breath, then switch. This teaches the neuromuscular system that one-foot-off is safe.
- Both feet up, butt still low. The moment both feet float, you’ll instinctively want to lift your hips skyward. Resist. High hips throw the centre of gravity backward and dump you onto your feet. Keep the tailbone pointing slightly down, as if you’re sitting back into an invisible chair. The legs will naturally follow into a tucked position.
- Straighten the arms — only later. The classic Bakasana often shows arms fully extended. That’s a more advanced version. In the beginning, bent elbows are your best friend. They create a longer shelf for the knees and lower the centre of gravity. Straighten your arms only after the bent-arm variation feels effortless for at least 10 seconds.
Lift-off rarely happens on the first attempt. It looks like tiny, incremental gains: one second of hover, three seconds the next week, ten seconds a month later. This is normal and, in fact, safer. Rushing into the full expression of the pose before the connective tissues in the wrists and shoulders have adapted is a reliable route to injury.
When to Skip Crow Pose (3 Safer Alternatives)
Crow pose is not for everyone, and that’s not a failure. It’s anatomical wisdom. If you have carpal tunnel syndrome, an untreated wrist sprain, shoulder impingement, or a bulging disc in the neck, the load on the wrists and the forward trunk position can aggravate the condition. Pause and check with a physical therapist if you have pain that lingers after letting go of the pose.
For those who need a different path to arm balance strength, these variations build the same foundations with less compression:
- Supported Knees-to-Chest on Blocks: Place two yoga blocks on the highest setting under each hand. Assume the same arm position but let your feet stay on the ground. The elevation reduces the wrist angle dramatically and allows you to practice the core-compression and forward-lean mechanics without any weight on the hand joints.
- Supine Crow Pose: Lie on your back, draw your knees toward your armpits, and shape your arms as if you’re balancing overhead. Press your shins into your upper arms and engage your core. This yields the same muscular firing pattern with zero risk of falling.
- Chair Crow Pose: Sit on the edge of a sturdy chair. Place your hands on a yoga block in front of your feet, lean forward, and lift your hips off the chair just a few centimetres. The chair catches you if you tip. It’s an ideal intermediate step for those who find the floor too psychologically daunting.
None of these alternatives are “less than.” They are intelligent progressions that respect your current body. The crow pose will still be there when you’re ready.
Medical Disclaimer: This content is for informational purposes only and does not constitute medical advice. Always consult a qualified healthcare professional before making health-related decisions.